
Like the GPS always tells me, “Recalculating….”
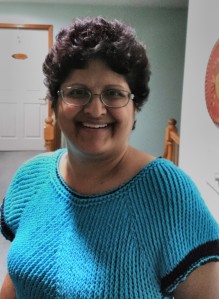
The ancient Egyptian goddess Hathor, is also known as the Lady of Stars and the Mistress of Heavens. She is the goddess of beauty and love, music and dance. Her sacred stone is turquoise and her sacred metal is copper. The Lady of Stars Dress is designed in honor of the Goddess Hathor, and in her sacred colors of turquoise and copper. Egyptians invoke the Goddess Hathor for luck in love, success in their endeavors, and victory on the battlefield. The Greeks call on her by the name Aphrodite.
I designed this dress to be: 1) top down 2) round yoke 3) circular knit 4) seamless 5) easy to modify Neckline: 24 inches Gauge: 4 st to 1 in horizontal stockinette Needle: size 9 on a 16″ circular Yarn: Bernat Cotton (turquoise) and Lion Brand Cotton (brown) Cast on method: Two color longtail cast on.
Pattern:
1. Cast on 96 st on size 9 16″ circular needle with two color long tail cast on.
2. Join to knit in the round. PM at joining stitch.
3. Knit in garter stitch (k one row, p the next) for 4 rows. This makes two ridges, and is about 1/2 inch in length. PM (in alternating colors) every 12 st.
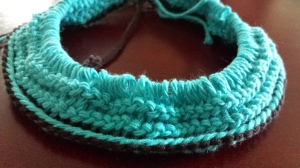
Cast On and Garter Neckline
Neckline = 3/4 inch long
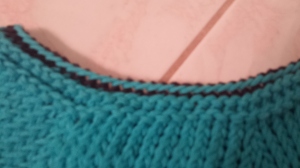
4. Begin stockinette stitch (k all rows). Do four increases every round, evenly spaced (every 24st). (do in every alternating group of 12 stitches)(there are eight groups of 12 stitches each, so 1, 3, 5, and 7 are where the increases are in the first round [mark with blue marker], and rounds 2, 4, 6, and 8 are where the increases are in the second round [mark with pink marker])(be consistent – do the increases in the beginning or the end of the 12 stitch grouping, and do not change where you decide to do them for the rest of the project [I did the increases at the end of the stitch grouping]) Increase used: http://techknitting.blogspot.com/2007/05/very-nearly-invisible-increase.html
If you look closely, you can see where I made an error in my increases here.
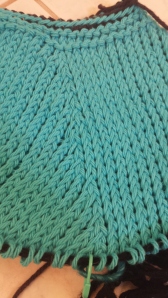
5. Work in stockinette stitch until dress reaches underarms.
One Inch from Underarms = 6 inches
6. Mark st for sides of garment so you can distinguish between the front and back.
7. Add markers for sleeves. Sleeves are 1/3 of the stitches. So left sleeve is 1/6 of the stitches. Right sleeve is 1/6 of stitches. Front is 1/3 stitches. Back is 1/3 stitches. (OK, so I tried it on and did it a little differently. Language note: Repeat: Area between two markers. I am doing two repeats = left side, two repeats = right side, two repeats = front, two repeats = back).
8. Work sleeves to length desired, then bind off. (Generally, a 7 inch raglan is perfect. YMMV).
9. CO underarm stitches (10 st each side, for me). Do those in garter, the rest in stockinette. This should add structure to the dress. (124 st)

10 (EZ style instructions). Do a few paired decreases for the waist, and corresponding paired increases for the hips.
10a (this is what I did). Knit until dress is 15 inches from center neck. I did not do waist shaping because I gained a lot of weight and no longer have a waist to shape. YMMV. (124 st)
10b (if you have a nipped in waist [smaller waist than chest], do this). If you have a nice waist indentation, start decreases 12 inches from center neck. Gauge is 4 st to 1 in, so for every inch you need the waist nipped in, do a 4 st decrease. If you want princess seams, do the decreases in the same place every decrease. (I like two of the decreases in a straight line below the nipples, and two correspondingly in the back). If you want the decreases to blend into the dress, then space them out evenly). [There are currently 4 st on the needle… a 1 inch decrease would take it to 120 st, a 2 inch decrease to 116 st, a 3 st decrease to 112 st] [How often you do a decrease row depends on the number of decreases you need to do (eg: the number of inches you need the waist nipped in) [My row gauge is 6 rows to 1 inch.. do the decreases over 3 inches around the waist, so you have 18 inches to work with. Therefore, if you are going to do a 1 inch decrease, do it 12 inches from the top and then just keep on knitting as usual. If you are going to do a 2 inch decrease, do it 12 inches from the top, and then again 13 inches from the top (which is after 6 rows). If you are going to do a three inch decrease, do it at 12 inches, 13 inches (6 rows later), and then again at 14 inches (another 6 rows later) from the top.](This sounds like a lot of work, but the result is SOOOOO worth it. (Most especially if you have a nipped in waist and larger hips – the decreases for the waist paired with increases for the hips makes you look super curvy and super hot). [After the decrease, knit another one inch (6 rows) and start the increases for the hips – do them in the same place as you did the decreases for a princess seam look, and spread them out if you want a more subtle look].
10c (if you have a larger waist than chest, do this). Look at 10b, above, and where there are decreases, instead do increases. The concept is the same.
11. (this follows 10a, which is what I did)(124 st on needle, 15 in from center neck). To get it to a “just covers the top of your jeans pockets” length (at least on me) you need to knit for 6 inches. Your hips are bigger than your waist (at least, mine are), so you need to do increases at this point. I’m increasing 3 inches for the waist length to get to the top of the jeans pockets.
INCREASE ROW 1: At 15 inches from center neck, do a 4 st (1 inch) increase, then knit for 4 rows — no increases at underarms, which gives 104 st to work with, 52 at front, 10 under left arm, 52 at back, 10 under right arm. Front and back: k17, inc1, k18, inc1, k17; underarms: continue in garter stitch pattern (128 st on needle). (I did it only up to here)
(optional) INCREASE ROW 2: At 16 inches from the center neck (or, 6 rows later), do a 4 st (1 inch) increase, then knit for 4 rows – no increases at underarms, which gives 108 st to work with, 54 at front, 10 under left arm, 54 at back, 10 under right arm. Front and back: k18, inc1, k18, inc1, k18; underarms: continue in garter stitch pattern (132 st on needle).
(optional) INCREASE ROW 3: At 17 inches from the center neck (or, 6 rows later), do a 4 st (1 inch) increase, then knit for 4 rows – no increases at underarms, which gives 112 st to work with, 56 at front, 10 under left arm, 56 at back, 10 under right arm. Front and back: k19, inc1, k18, inc1, k19; underarms: continue in garter stitch pattern (136 st on needle).
(optional) INCREASE ROW 4: At 18 inches from the center neck (or, 6 rows later), do a 4 st (1 inch) increase, then knit for 4 rows – no increases at underarms, which gives 116 st to work with, 58 at front, 10 under left arm, 58 at back, 10 under right arm. Front and back: k19, inc1, k20, inc1, k19; underarms: continue in garter stitch pattern (140 st on needle).
(optional) INCREASE ROW 5: At 19 inches from the center neck (or, 6 rows later), do a 4 st (1 inch) increase, then knit for 4 rows – no increases at underarms, which gives 120 st to work with, 60 at front, 10 under left arm, 60 at back, 10 under right arm. Front and back: k20, inc1, k20, inc1, k20; underarms: continue in garter stitch pattern (144 st on needle).
(optional) INCREASE ROW 6: At 20 inches from the center neck (or, 6 rows later), do a 4 st (1 inch) increase, then knit for 4 rows – no increases at underarms, which gives 124 st to work with, 62 at front, 10 under left arm, 62 at back, 10 under right arm. Front and back: k21, inc1, k20, inc1, k21; underarms: continue in garter stitch pattern (148 st on needle).
(optional) Then knit another 4 rows (1 inch).
12. BINDING OFF FOR A TOP
You are now 21 inches (or however long you want your top to be) from the center neck, and probably done. Try your knitting on again. If you just want a blouse, you are DONE (just bind off here – you may consider doing a few rows of garter stitch in brown yarn to match the neck if you like). Otherwise continue the pattern for a dress.
Top cast off options:
12a. The usual. Whatever you do. Pick a neat one from one of the cast on cast off books out there. Hem will curl upward. I dont’ really recommend this.
12b. Garter stitch in one or two colors, as you prefer. Maybe 6 rows (3 ridges) to match the neckline. This will make the hem sit nicely too.
12c. I-cord. I don’t think this matches the look of the top/dress. I don’t really recommend this.
12d. Stockinette to desired hem length. One row purl stitch. Then, with a smaller needle, stockinette for an inch. Turn hem at purl row, sew into place. It might be cool to do the turned under hem in brown yarn. It’s still stockinette, but it will sit nicely because of the turn under. (I would do this for a bind off for a blouse)
12e. Crochet (slip stitch or single crochet). Same color or contrast color. This way the hem will sit nicely and not curl upward.
13. SKIRT
When doing the skirt, stop doing the underarm stitches in garter stitch!!! Just stockinette all the way around!
I worked the top until increase 1, which gave me a round with 128 stitches on the needle.
My logic: I wanted to expand rapidly and have a flared skirt, no pleats, that matched the yoke of the dress.
Increase 8 stitches per row, every 4 rows as follows:
PM every 16 stitches (center the markers in an attractive way). Before each marker, do an invisible increase.
At every increase row thereafter, do the increase right before the marker (don’t bother counting the stitches between the markers anymore, there’s no point).
Keep knitting until dress is THREE INCHES LESS than the length you want it to be. IT WILL GROW. (Remember this if you don’t want to look like the visiting Amish (not that there’s anything wrong with that)(It’s a quote from Seinfeld, most notably THIS episode)).
13. Bind off (as in 12 above). Block. Wear.
13b. DOUBLE FLARE SKIRT
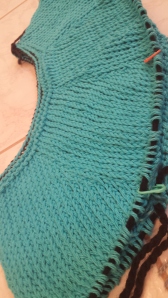
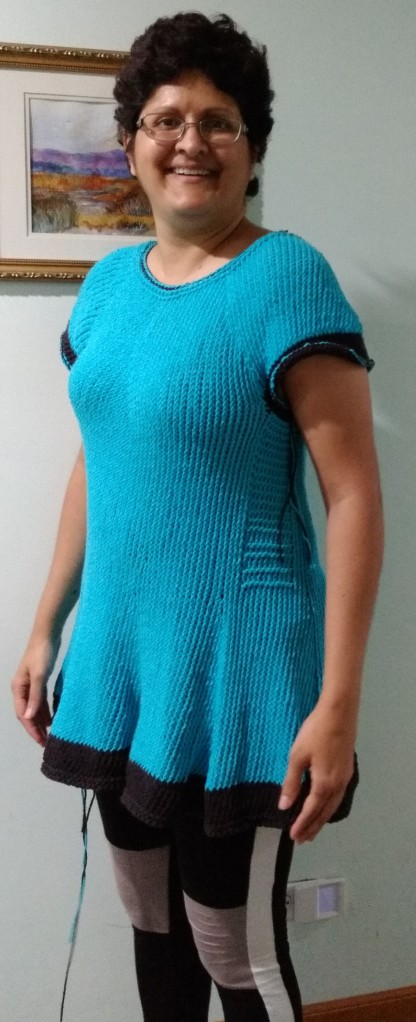
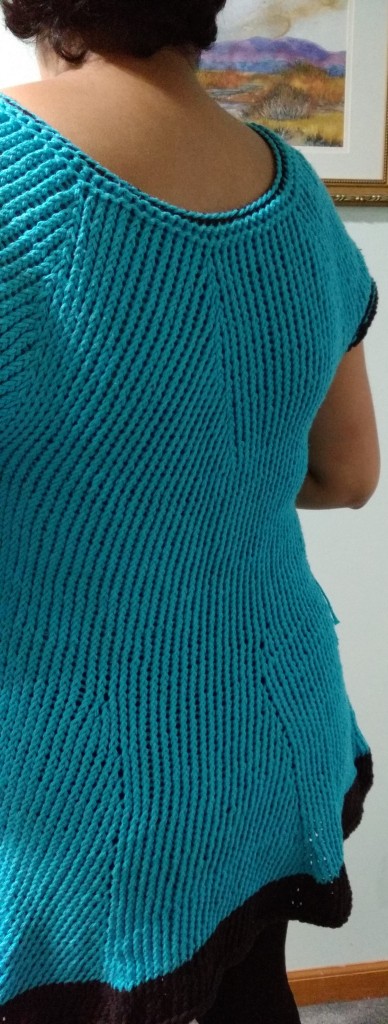
Increase before and after marker. This makes a flippy skirt. Do that every 2-3 rounds until length is as you desired. (I did the increases from 13 for a few inches, then added the double flips – if you look at the picture closely, you can see the added flip in the skirt)(the first flip goes in one direction, the added flip is in between the original flips, and goes in the opposite direction)(this creates kind of a box/square pleat, or a kick pleat, as it’s called (I guess)).
Change color to brown. Keep knitting as 13b for the next few inches.
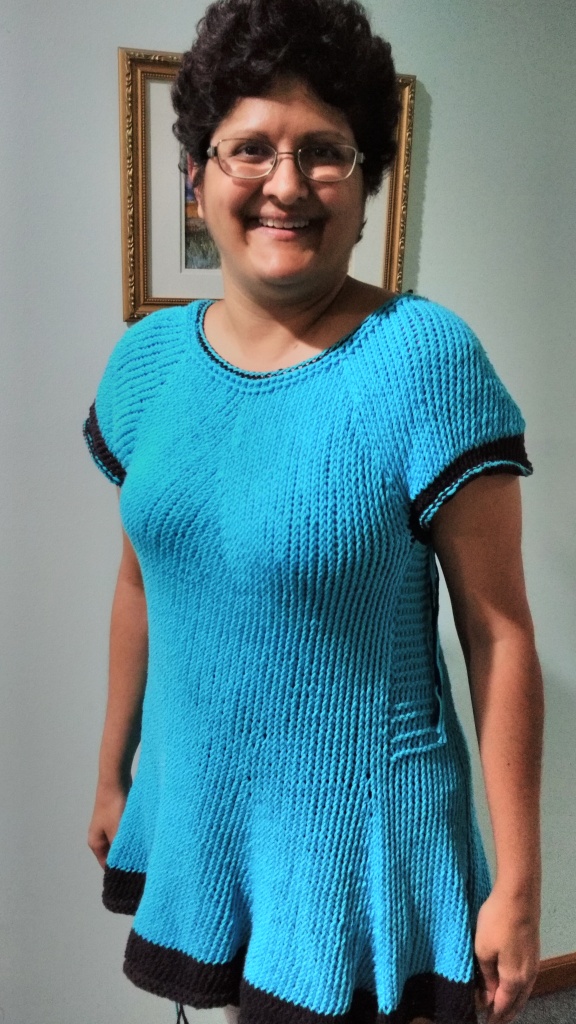
Added a blanket moss stitch pattern in brown for a few inches to add weight to the hem and some interest to the design.
Icelandic bind off. (I did this)
If you look at the dress in the picture, it’s great for a younger woman, or a thinner woman, but on me it doesn’t really look age appropriate. I would like to add four inches to it. So I intend to pick up the bind off skirt in blue, and knit for two inches, then do a few rows in garter, then change to brown again, knit for two inches, do a few rows in garter, and then do the two color icelandic bind off again.
15. CAP SLEEVES
Instead of just binding off the sleeves above, PU 68 st including the live st). PM at the top of the shoulder and the bottom of the underarm (every 34 st). (I did this, you can see in the picture that the sleeves have a brown part, that’s my short row cap sleeve as below).
k 1 round
Japanese short rows at 10, 20 and 30 st on each side of the shoulder.
Icelandic bind off (two color).

 Can anyone look at this chart and understand it? This looks so complicated… Maybe when you’re actually doing it, it’s easier? IDK, I’ll let you know..


